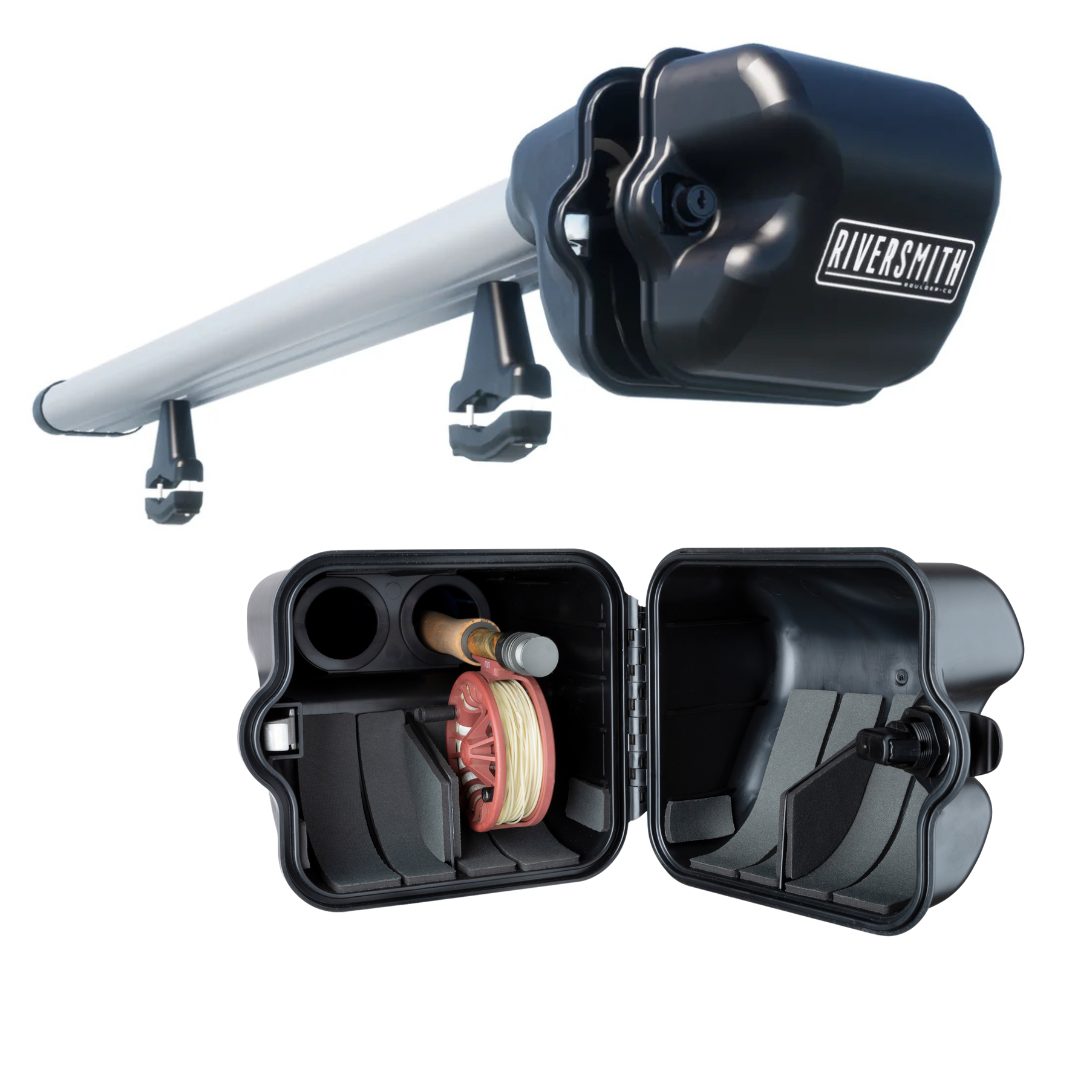
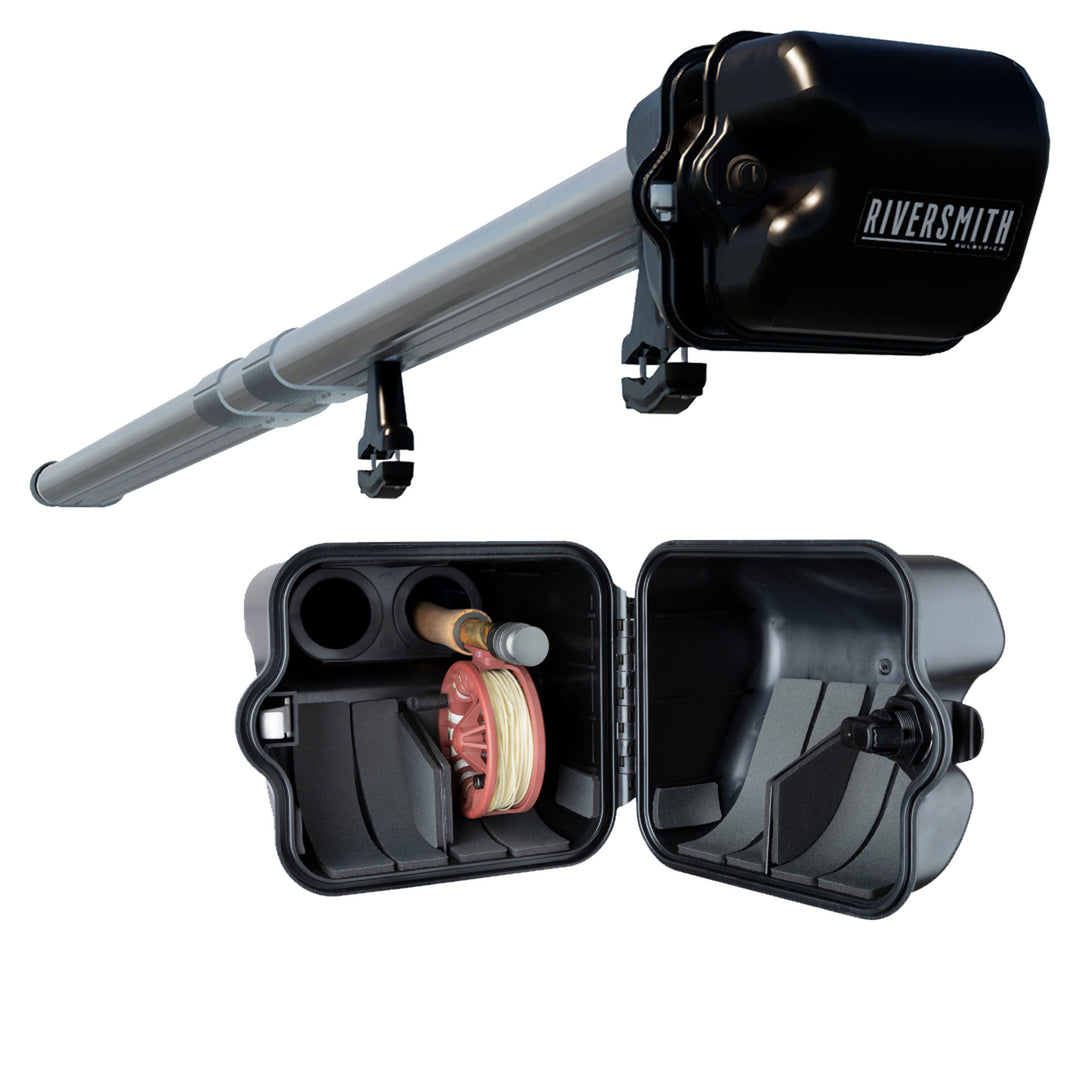
In this new Swiftcast Rod Holder Assembly and Installation Video, Jason Thomas shows you how to assemble and mount the unit. One of the biggest benefits of using the Swiftcast is protecting your fly rods when you’re on the water. Another huge benefit, is that has an array of mounting options and can be used with almost any raft frame.
To successfully assemble and mount a Swiftcast, all you need is 4mm hex wrench or the Riversmith Mini Ratchet. Here are a few key points from Jason's how-to video.
Assembly
STEP 1 - Unbox and Prepare Parts for Assembly
STEP 2 - Install Reel Box & Nose Cone on Channels
STEP 3 - Install Universal Mounts
STEP 4 - Join Channel Extrusions
STEP 5 - Mount Swiftcast on Raft Frame (see below for more detail)
STEP 6 - Attach Curved Tubes and Pipe Clips
Mounting & Configuration
Now that you know more about assembling the Swiftcast, here are a few tips and tricks for mounting units to your raft frames:
1) Determine which side of your raft and the direction the Swiftcast will face before assembling the Swiftcast.
2) Install the universal mounts on the channel extrusion before installing the nose cone or reel box
3) Unstrap and elevate your frame off your raft when installing your Swiftcast. It will make the process of tightening the universal mounts much easier.
4) Using a 4mm mini ratchet or 4mm driver will accelerate the installation process.
5) If you are concerned about the pipe clip popping off, you can use a rubberband looped around the tube with the ends around the pipe clip thumb tab.
If you have any questions about your specific raft or frame or questions about assembly or mounting, please reach out to us at info@riversmith.com. To purchase a Swiftcast Rod Holder today CLICK HERE.