Today, Jason Thomas from Riversmith will share 10 tips and tricks and fun facts about the River Quiver Quick Release Mounts:
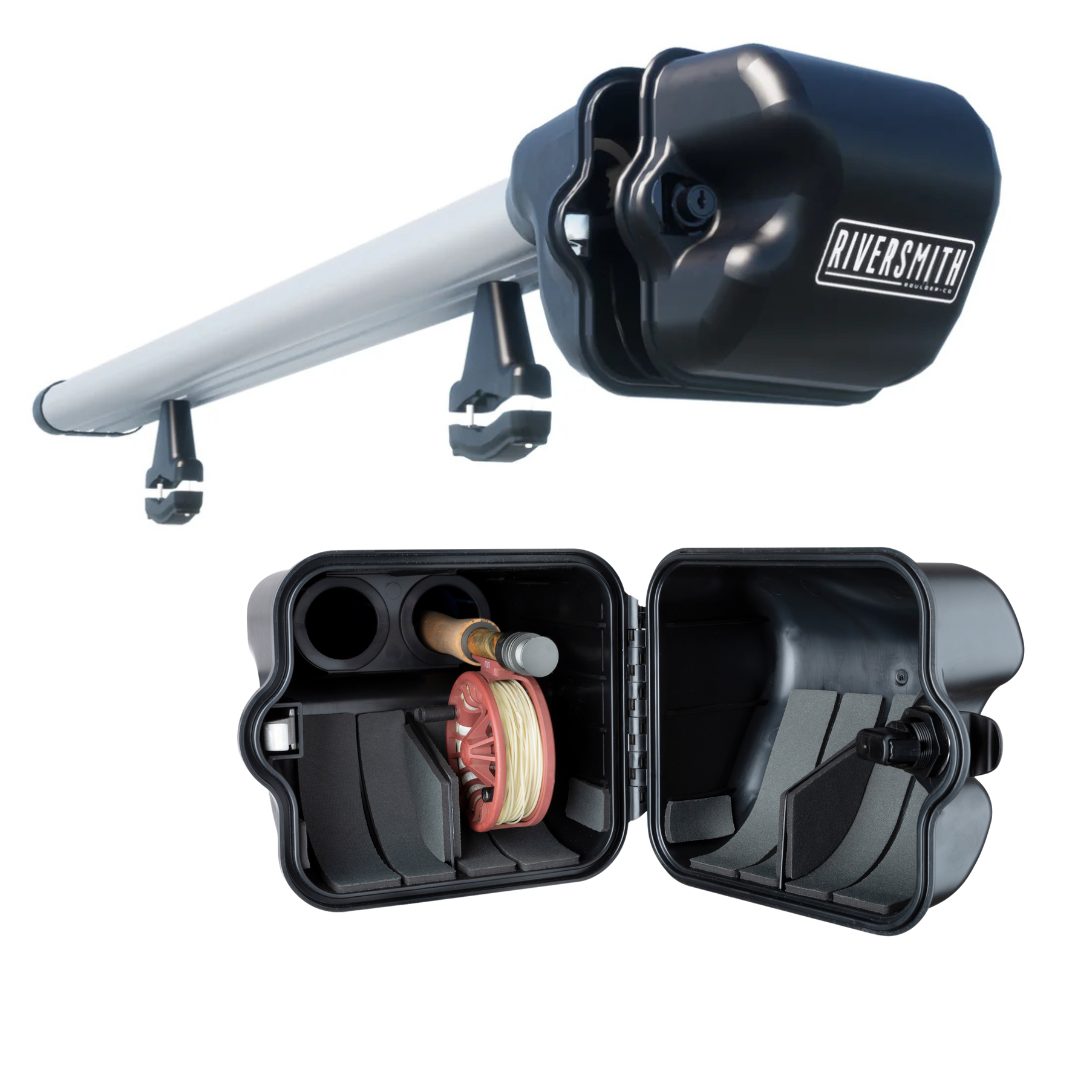
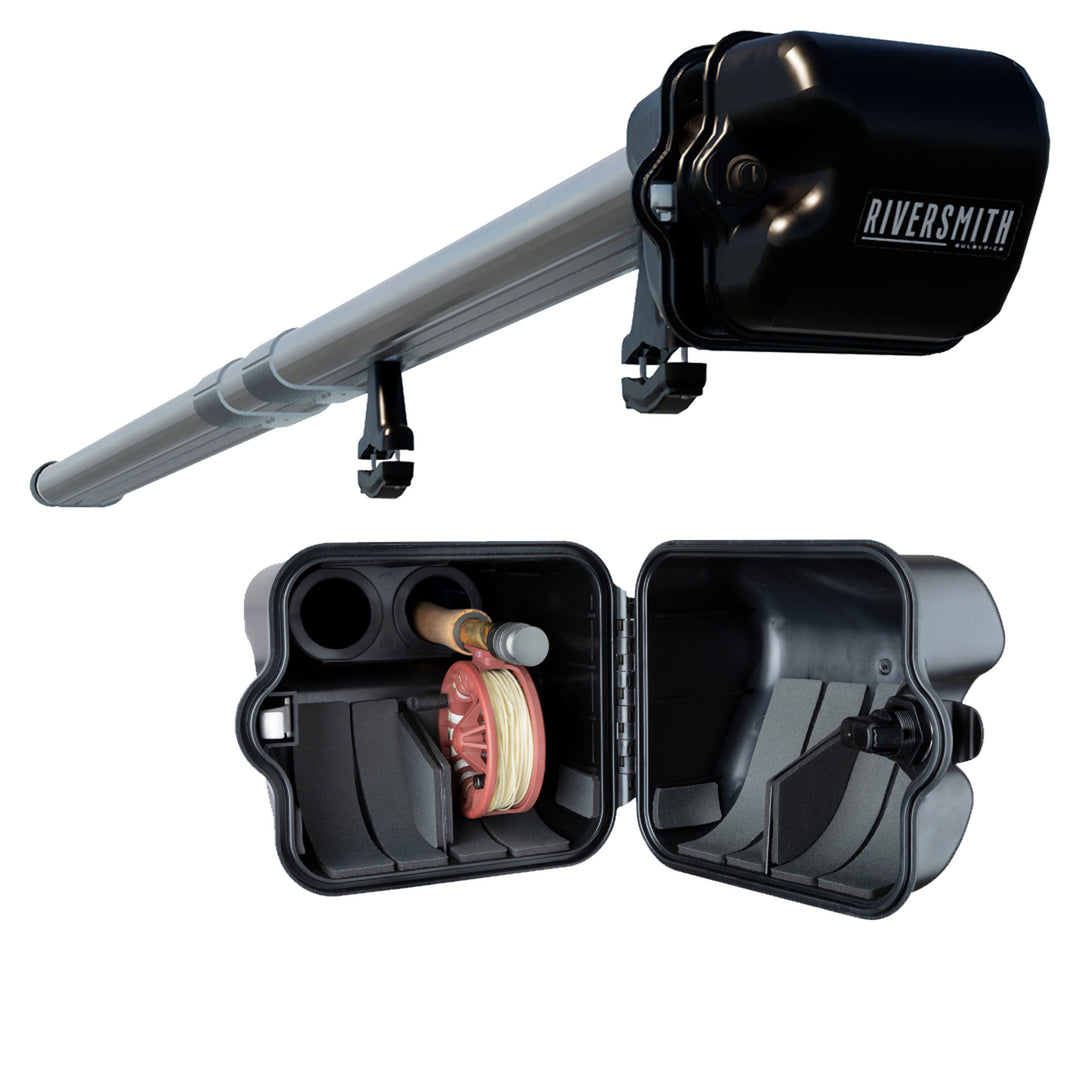
1) Quick Release Mounts are lower-profile than Standard Mounts and may require flipping the River Quiver upside down to avoid the reel box hitting the roof of your vehicle. Either way, with the QR mounts you can configure your River Quiver reels up or reels down.
2) When you are installing the Quick Release Mounts, start off by measuring from center of front crossbar to estimated location of the River Quiver reel box. Generally it is best to spread vehicle crossbars as far as possible.
3) Next, you’ll want to place your River Quiver on your vehicle and then monitor interference of rear hatches or doors.
4) After that, mark River Quiver where Quick Release Mounts should be positioned to attach to vehicle crossbars.
5) Tighten mounts is an important step. Remove from vehicle and rotate the entire Quick Release Mount clockwise until secure and parallel with the extrusion. Ensure each mount aligns with marks made previously. Repeat for each mount. DO NOT OVERTIGHTEN OR DAMAGE.

Pictured: A River Quiver 2-Banger with Quick Release Mounts
6) Next up: place your River Quiver back on vehicle aligning each Quick Release Mount with the cross bars. Pivot the mounts to allow the latch to open fully. Attach strap to the slot in latch and close latch completely. For flat crossbars, pivot mounts back to flush, for angled crossbars, mounts can remain pivoted to follow the shape of the bar. Tighten Mount Pivot bolt securely.
7) We’re almost there: adjust the tension bolt for each tension strap with 4mm hex wrench until you are able to turn down each latch tab with secure tension around the cross bars.
8) After fully securing each Quick Release Mount tension strap, lock the locking mounts with key provided. Once installed check for security and function of River Quiver. Quick release mounts and river quiver must be locked to function as intended.
9) Remember: This custom design allows you to install, lock/unlock, and remove the River Quiver from your vehicle at any given time in seconds. The Quick Release mount is fully locking and will work on any crossbar system.
10) If you’re looking to install and take off your River Quiver multiple times in a season, the QR mounts are a great option to think about.
To learn more about Riversmith's Quick Release Mounts or to make a purchase today CLICK HERE.